In this blog we will describe, how we upgrade our cnc milling/router machine with new 4th axis for CNC machine and get more functionality, how to setup, wiring components and Configuration in Mach4. New upgrade in machine shop with intention to improve our support even additionally and also for making products for our development and needs.
If you have not installed and configured MACH4, follow the instructions in the step by step guide for Pokeys57CNC and MACH4. The configuration in section below is additional steps for setting up in MACH4 with 4th axis CNC for your CNC machine.
Installation and wiring components
In photo below – wiring diagram it is shown components which was added into CNC controller box for connection rotary axis stepper motor. So we add an stepper motor driver PoStep60-256 which is connect with flat cable with existed CNC controllers PoKeys57CNC and with stepper motor.

Stepper motor parameters
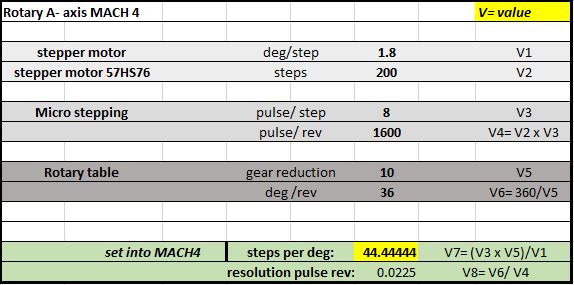
For easier calculating and check all data, in photo below is data table. In data table we insert data from stepper motor:
- deg/step
- steps
- pulse per step
All data obout stepper motor you get in datasheet of used motor.
On rotary axis we have also reducer – different types. We have planetary reducer and gear reduction of reducer ratio we also add into data table. For easier reading and using data table in right side of data table (under value) is showed how to use it.
Configuration in MACH4
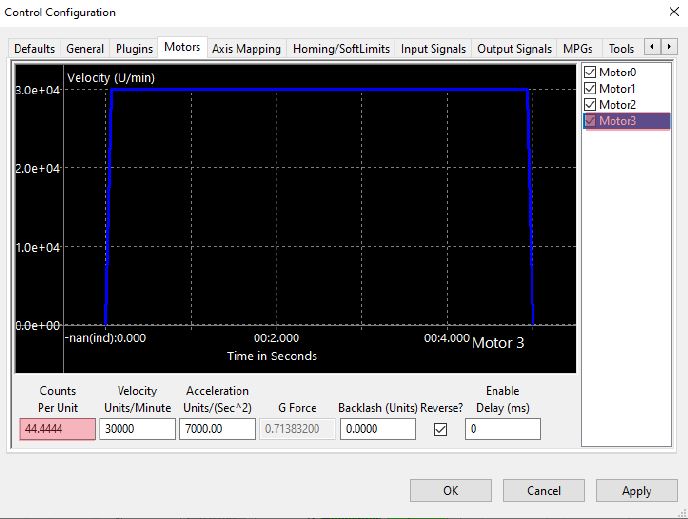
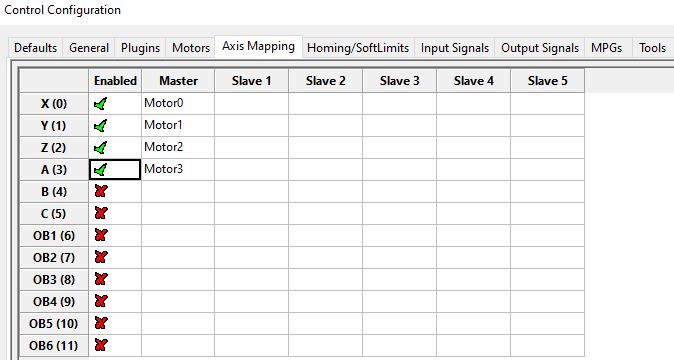
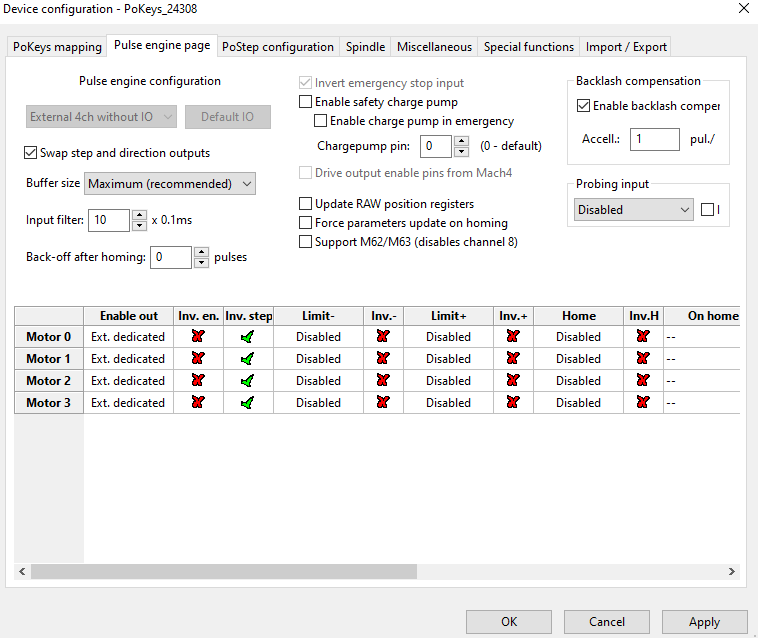
When we have all data calculated, we start with insert – Configuration data into MACH4.
- Firstly, set motor: Counts per unit is calculated value,
- Secondly, set – enable rotary axis motor (A),
- After control configuration, set- enable data in plugin- pulse engine.
Control configuration
Workpiece and rotary axis setup
Rotary axis has following characheristic:
- 550 mm working lenght (between jaw chuck and tailstock),
- 4 jaw chuck (80mm diameter),
- tailstock,
- planetary reducer,
- stepper motor Nema 23(SY57STH56-4004A).
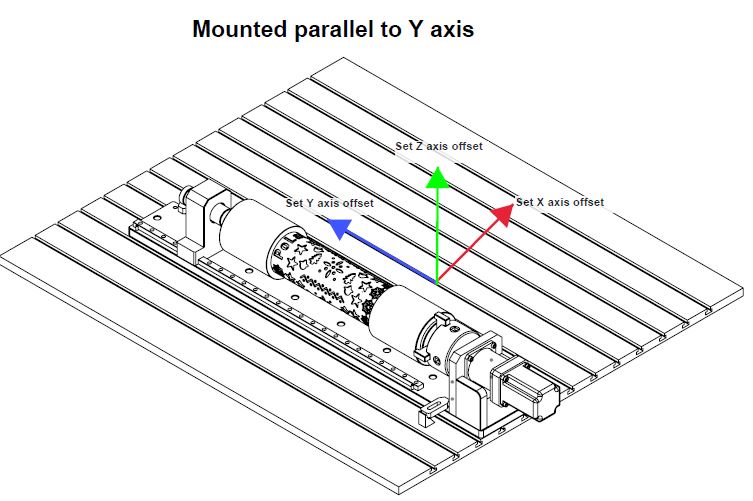
On photo below, is presented how 4th axis is mounted on CNC milling/router machine and how is oriented. When we mounting rotary axis on machine we must pay attention on:
- Rotary axis must be correctly clamped on the CNC machine table,
- Rotary axis must be perfectly aligment – coaxial to the axis Y or X,
- check the working area of CNC machine,
- When mounting was finishing is important to set a zero point, usually zero point of Workpiece is in the middle of part-diameter,
- When we programming rotary axis we must pay attention on correct positions and safe movements near equipment and workpiece because all of us want to machining without collision.
Operation – rotary axis
We successfully mounted 4th axis for CNC router, correctly wire electronic components and configure in MACH4. So we want to test operation, write some G-code and check the rotation and correct angle of turning (before check protocol set A axis to zero, it is important to get real data-measurements). So If all stepper motor parameter was correctly calculating and set into MACH4, rotary axis will work properly. When you enable MACH4, you will now be able to use the referencing all axis, zero A-axis buttons and jogging rotary axis.

4th axis – test part
Finally we arrived to test part. With upgrading CNC machine with rotary axis we want:
- Firstly, more functionality on machine,
- Secondly, make some useful parts from different type of materials.
In photo below – 4th axis / rotary axis milling part. Machining was fine and machine work properly with rotary axis and this is important for successful try-out.


More about
PoLabs web page,
More information about PoKeys I/O devices
The post 4th axis for CNC – MACH4 and PoKeys57CNC appeared first on PoBlog™.